ESign - Counter: Monthly Service Agreement
Note: CounterSign module will need to be configured before using.
Monthly Service Agreement
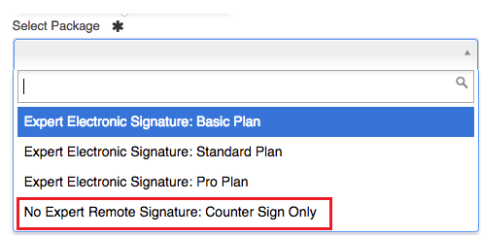
You will need to sign up for the POR eSign service at www.rentalesign.com/signup and enter your company information. Select No Expert Remote Signature: Counter Sign Only from the drop-down list on the first page, then enter your credit card information on the second page You can set up a password once the account has been created. This will allow you to send out unlimited number of countersigns each month.
Multiple Tablets - One account can be set up for multiple tablets. There is an initial cost for this first tablet and additional fee for each additional tablet.
E-Sign Setup
Once your account has been set up under the Company Status, you will need to save your username and API key to finish the set up in your Point of Rental software.
*Note: If you already are using eSign then you will not need to do the following*
You can go to Program Menu>Configurations>Reports and Notifications>System Email Setup. Enter the username and API key in the appropriate fields.
* Note: the eSign API Key in this document is an example only
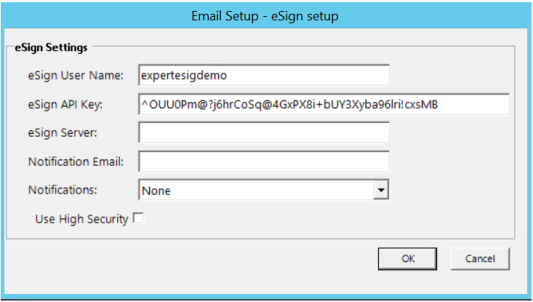
eSign User Name: This is the username you set up in your eSign Web page
eSign API Key: Enter the API Key from you eSign Web page.
- Note: this will link your Point of Rental to your web account.
Counter Sign: How it works
Allows you to capture a digital signature over the counter using a mobile device.
You will need to sign up for the POR eSign service at www.rentalesign.com/signup and enter username and API Key from your esign user account. Please refer to the following Esign document in Net Help.
From the Counter System go to Tools>Print Setup> Advanced Tab.
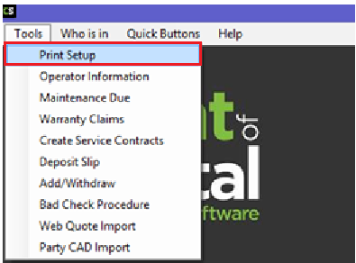
Select modify and enter COUNTERSIGN in the Signature Filemame field.

In Day at a Glance, you can set your columns to show the status of a countersign document. Right click on the blue header bar (above the first contract on the list), Check the eSign box and use the Move Up button to move the eSign column to the top of the list and select save.
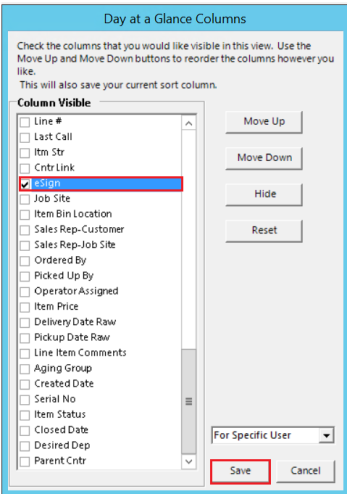
This will add the eSign column to your Day at a Glance.

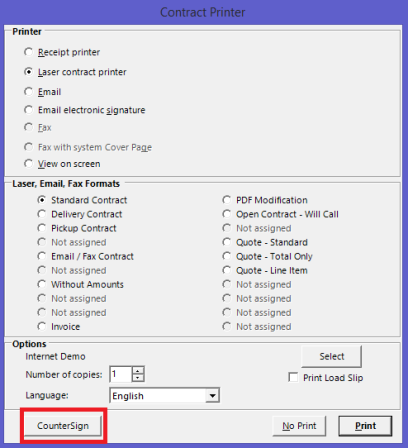
From the print screen you can select CounterSign and the Customer Signature screen will appear.
The Name, Company and email will default with the customers information or can be manually edited.
*Note 1: If you print loadslips, after the CountersSign is complete you can set number of copies to zero and select Print and only the load slip will print.*
*Note 2: Pressing the countersign button will pull the Laser Contract format assigned under Program Menu>Configurations>System Configuration>Parameters>Contracts Tab>Default CounterSign.
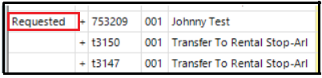
In your Day at Glance Screen once you have selected Countersign, In the eSign column, the word “requested” will be added.
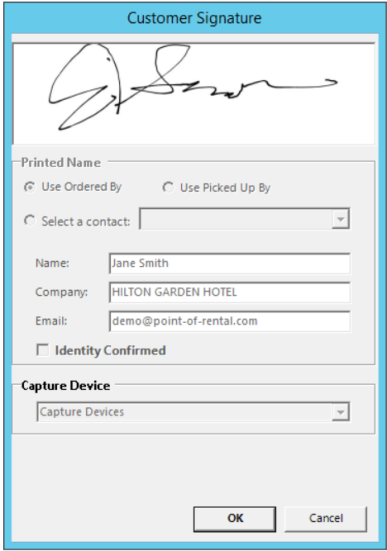
Once the ‘CounterSign’ screen comes up, there are several options. If there is an ‘Ordered By’ or ‘Picked Up By’ assigned to the contract, they can be selected using their respective radio buttons. If none are assigned to the contract, these options will be grayed out. A contact from the customer record itself can also be selected from the drop down. Without any of these, the system will default to the name and email on the customer record.
At this point the user should check the Identity Confirmed checkbox or click the ‘Get Signature’ button. The identity confirmed checkbox is used to let the system know that the user has selected the correct customer contact. Once the document is ready it will auto load to the CounterSign signing device. The Identity Confirmed feature is not a requirement; however, if not used, the user must manually click the Get Signature button once document has been built and is ready to be signed.
Select Get Signature.

The contract is now sent to the mobile device waiting forr your customer to sign.
(Counter View)
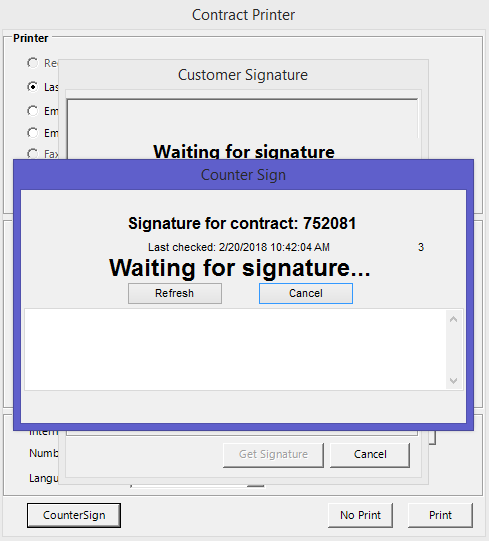
- Note you will see time on the right side counting down waiting for the signature.
(Customer View) on their mobile device.
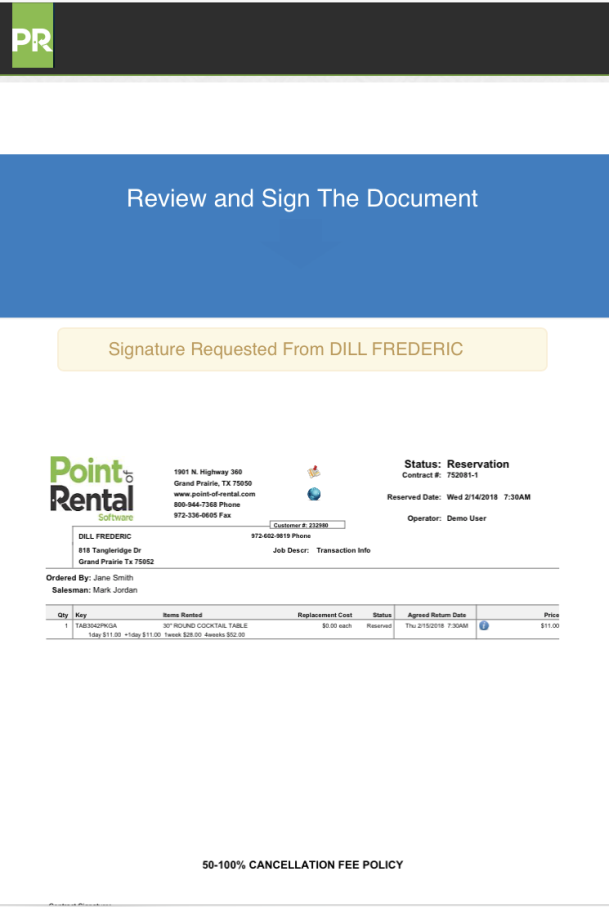

You can either sign or enter in your name in the text field.

They confirm their signature and will have an option to get an emailed copy of the contract.

Once the customer signs the counter person will see the signature on their screen.
(Counter View)
* Note: If there is an email address populated in the email address field in the countersign box. Then by default, the Send me this contract in an email will automatically be checked.

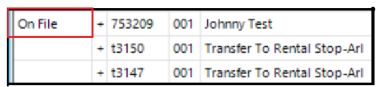
Click on OK to accept the signature. In your Day at a Glance, The “Requested” in the eSign column will change to ‘On File.” If it takes to long for the eSign too update, you will receive a “Timed Out” message under the eSign column.
A link to the signed contract can be found in the transaction edits of the contract. When the View is Black, it is in a pending state waiting to be updated. Once updated, it will change from black to red to and say View.

Click on the view to see the signed contract along with the Official Signature Page

Setting the scheduled task
You can set a scheduled task on how often esign confirmations will update in Day at a Glance. Once the customer signs and returns the eisgn documents, the status in Day at a Glance will change from “requested” to “on file. You can set the task to update by the minute, hour, day, week, etc.
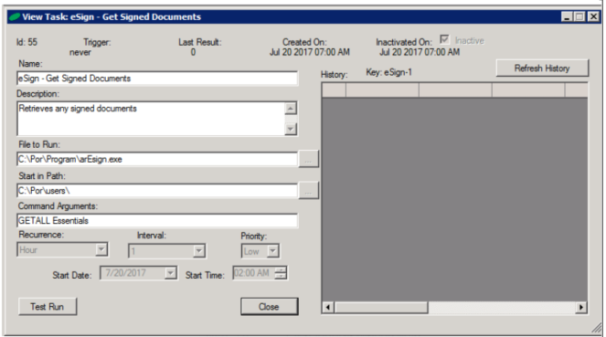
Go to Program Menu>Configurations>System Configurations>Configure Task Runner
* Note: Change the recurrence from 1 hour to 5 minutes. This will update Day at a Glance every five minutes.
Name: Enter the name of the scheduled task
Description: Enter a brief description of the task.
File to run: Enter the file name . Enter the drive letter your point of rental program is installed on, followed by the file name (See example above)
Path Name: Enter the drive letter followed by the path name. Drive letter will be were your point of rental is installed on. (See example above)
Recurrence: You can set the amount of time between updates, (Minutes, Hours, Days, Weeks, Months)
Interval: This would ab a numeric number entered for the amount of (Minutes, Hours, Days, Weeks, Months)
Setting the default contract format: this allows a user to set a default contract format (in Parameters) for the eSign Counter feature. If they set a default, every esign counter contract will use this format, if they don't, it will use the format selected in the print screen UI.
Shortcut’s: Pressing 'C' on the keyboard will take you directly to Esign Counter.
# of copies: You can set 0 copies in Parameters and it will be loaded into the Print Screen
Print Screen: The print button will the active button- pressing enter will print x contracts (from your parameter settings)and a load slip (if turned on).
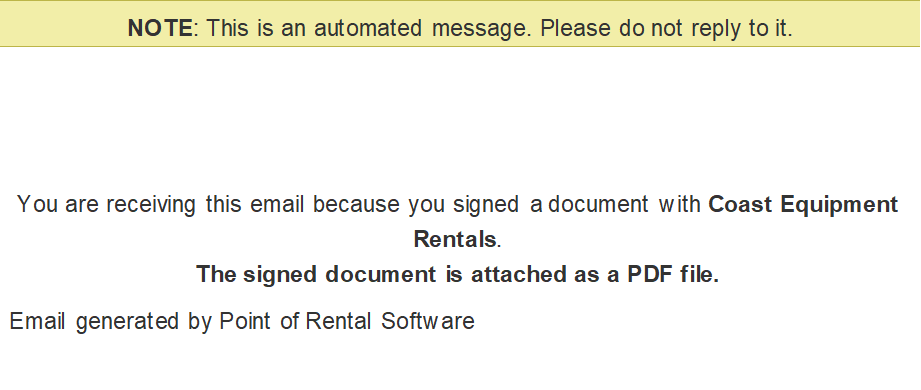
Request email copy.
When sign a document through countersign, you can request a copy of the contract emailed to you. The email will contain the informantion below along with an attachment of the contract.