Emailing An Attachment Through eSign
You can email an eSign document without sending a contract. From the Customer Record, select Functions then Email Customer. Select the Attachments tab and choose the attachment. Once the attachment is chosen, select the eSign button.
Note: Only one attachment will be linked with eSign capabilities. If you need to send multiple documents, multiple emails will need to be sent.

You will be able to track the status within the Customer Record. Select History> Transactions> Transaction Edit History.

The defined Action is listed as ‘Request eSign’. The file name of the attachment will be listed in the Note section. Once the document has been signed, the Action will change to ‘eSign Complete’.
Notification Setup
You can now be notified when an eSign document is sent to the customer and when the document has been signed. To set this up through Configurations> Reports and Notifications> System Email Setup> Select eSign Setup:
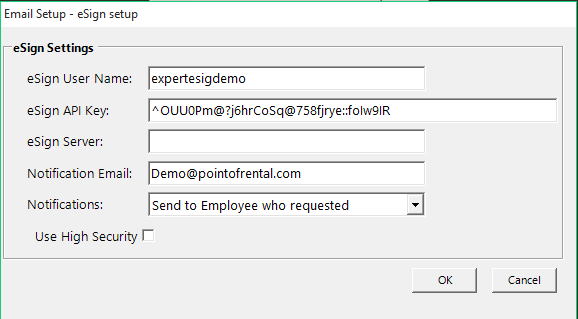
eSign User Name: This is user name assigned during the account set up process.
eSign API Key: The key is assigned to the customer during the account set up process. IF THIS KEY IS ALTERED, YOUR ESIGN WILL NOT FUNCTION PROPERLY.
ESign Server: Only use this if you have a specific stand-alone server for your email hosting.
Notification Email: The email address(es) listed here will receive a notification when the eSign document is sent to the customer for signature, and when the eSign document is signed by the customer.
Notifications: Below are the options for whom receives the notifications.
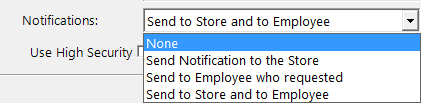
Note: (a)The ‘Store’ is considered the Global Email address. (b)The Employee will need to have their email address filled out in the Contact information within the employee record.
Use High Security: This will require the receiver to confirm the sender’s email address before reviewing the attachment. After the receiver signs the document, he/she must type in the name that is below the signature line on the contract and select the Agree box.