
How to get there: Program Menu > Accounts Receivable > Print Statements
This program prints statements for your customers. First you will be asked to enter the Password. If you don't know it, just press ENTER and you will be returned to the PROGRAM MENU. If you have entered a valid password, the following menu will be displayed:
* Note - You can now print Statements with Numbers and Special Characters in the Customers Names
*Note: A note will be added to the Customer Edits screen when emailing or faxing a statement to a customer.
Customers to report - “ALL” means print statements for all customers that have had any activity or have a balance due. Other options include an Individual customer or by customer Type.
Individual - Select one customer to print a statement. Select the customer in normal fashion such as by key, number, driver license number, or name.
Customer type - With this selection, you can choose which type you would like to process. Then only those customers with that type will be selected.
Customer name from – By default all customers will be printed from A to Z. If for some reason you only wanted to print customers from A to M, you would change the ending letter to M. Also a batch that starts with the letter "A" will also include numbers and batches that end in "Z" will include special characters such as !$%#,
Payment type to report - There are three different selections: Account, Cash, or Account & Cash. If Account is selected, only contracts that are account status will print on the statement. If Cash is selected, only contracts that are NOT account will print on the statement. If Account and Cash is selected, all contracts regardless of payment method will print on the statement.
Contract status to report - There are three different selections: Open, Open & Closed, Open & Closed & Reservation. Only those contracts that are of the selected status will be printed on the statement.
Only Include contracts through - Checked means that only contracts through the entered date will be included on the statement. With this unchecked all contracts will be displayed regardless of the date of the contract. This would not normally be used unless you were running statements on the 3rd of the month and you only wanted the contracts through the end of the previous month. Note: Any contracts that have been paid between the through date and the current date will still show paid on the statement.
Print rent, sale, damage waiver detail – Checked means that the contract’s rent, sale, and damage waiver amounts will be printed on the statement. Unchecked means that only the total amount of the contract will be listed.
Print line item details – Checked means that every item on the contract will be printed on the statement. Unchecked means that no item detail will be printed.
Print line item price – Checked means that the price for each line item will be printed. This option is only available if “Print line item details” is checked.
Print signature – Checked means that the customer’s signature will print on the statement for each contract. This option will only work if you have a signature capture pad and the customer signed on the contract.
Print detailed invoices – Checked means it will print detailed invoices along with the statement. Unchecked will not print any invoices.
Unbilled Only – Checked will print only current invoices that have not be billed to go along with the statements.
* Note: This will only appear if the Print Detail Invoices box is checked.
Print payments – Checked means that all the payments for this customer will be printed on the statement. Unchecked means that no payment detail will be included.
Format – This option allows you to choose what default format you want to have set for your statements.
Heading – This option allows you to choose what format you want to have for the heading of the statement. The options include printing a logo, printing a large logo, and no heading for letterhead paper.
Grouping - Allows you to print statements by groups (Job ID, Job Site, Contract Status, Contract Info, Aging Date)
Finance Charges – This program assesses finance charges for past due contracts. Click on the Assess button and you will prompt for your Operator ID. Once entered, the following menu will be displayed:

Customers to report – “ALL” means assess finance charges for all customers that have had any activity or have a balance due. Other options include an Individual customer or by customer Type.
Individual – Select one customer to assess finance charges. Select the customer in normal fashion such as by key, number, dl number, or name.
Customer type – With this selection, you can choose which type you would like to process. Then only those customers with that type will be selected.
Customer name from – By default all customers will be processed from A to Z. If for some reason you only wanted to include customers from A to M, you would change the ending letter to M.
Payment type to report – There are three different selections: Account, Cash, or Account & Cash. If Account is selected, only contracts that are account status will be considered. If Cash is selected, only contracts that are NOT account will be considered. If Account and Cash is selected, all contracts regardless of payment method will be considered.
Monthly percentage rate – This is the percentage rate charged for finance charges. All past due amounts will be multiplied by this percentage to compute new finance charge amounts. Note: This default is set in Parameters. The annual rate is the monthly percentage multiplied by 12.
Days until Finance Charges incur – No finance charges will be computed on contracts that are aged under this number. Only contracts aged days over this number will be charged finance charges. Note: This default is set in Parameters.
Charge Finance Charges on late Finance Charges – Checked means that previous finance charge amounts will be assessed finance charges just like any other contract. Unchecked means that finance charges will be exempt from further finance charges.
Age contracts from OPEN date – Checked means that the aged days of a contract are computed from the open date of the contract. Unchecked means that the aged days of a contract are computed from the closed date of the contract.
Charge all stores – This is for multi-store locations only. With this selection you can choose which contracts will be considered for finance charges by store number. If this is checked then all contracts will be selected in spite of store location. If you uncheck this box, you will get a new selection to enter the desired store number.
Print Finance Charge Invoices – Checked means that each new finance charge will print an invoice to mail to the customer. Unchecked means that no invoice will print.
Printer Select – This option allows you to select the printer for the statements. The report printer will be the default. This option is only valid if “Print Finance Charge Invoices” is selected.
Number of Copies – This option sets the number of copies of each invoice that is printed. This option is only valid if “Print Finance Charge Invoices” is selected.
Generate – Click the GENERATE button when you are ready to assess finance charges. IMPORTANT: Only assess finance charges once a month. If you assess more than once a month, the customer will be double billed for finance charges.
*Note: There is a field in the customer record labeled No Finance Charges. The Assess Finance Charges program uses this field to determine whether to assess a finance charge for a customer. With this field checked, no finance charges will be assessed for the customer regardless of any other settings in Assess Finance Charges menu.
Payment date – This option is only available if “Print payments” is checked. This is the date through which payment detail will be printed. The date will default to the last date that the statements were generated for all customers.
Sort – There are three different sort options; sort by customer name, sort by customer number, and sort by customer key. This will be the order in which the statements print out.
Print zero balance statements – Checked means print all statements, even those that have no ending balance. In other words statements that only have contracts that are fully paid leaving a zero balance for the customer. Unchecked means only statements that have a non-zero balance will be printed.
Print credit balance statements – Checked means statements that have an ending credit balance will be printed. Unchecked means statements for customers with an ending credit balance will not be printed.
Report All Stores - This is for multi-store locations only. With this selection you can choose which contracts will show on the statement by store number. If this is set to All Stores then all contracts will be selected in spite of store location.
Printer Select – This option allows you to select the printer for the statements. The report printer will be the default.
Number of Copies – This option sets the number of copies of each statement that is printed.
Allow emailing statements –Checked means that statements will be emailed to customers marked in their customer record as email statements. Unchecked means that all statements will be printed rather than emailing. Note: This is an optional module that must be purchased. If the module has not been purchased, this option will be dim.
Allow faxing statements –Checked means that statements will be faxed to customers marked in their customer record as fax statements. Unchecked means that all statements will be printed rather than faxing. Note: This is an optional module that must be purchased. If the module has not been purchased, this option will be dim.
Fax Cover Page - To attach a cover page onto the statements you are faxing choose the cover page format you want to use from the drop down box.
Messages - This selection displays the current messages and allows you to change them. There are four message lines that will appear on the statements. The first is called “Top Message”, the second “Bottom Message”, the third “Balance Due Message”, and the fourth “Past Due Message.” You will be permitted to change any or all of these lines. The “Top Message” and the “Bottom Message” will be printed on each statement. The “Balance Due Message” will only be printed if there is a current account balance. The “Past Due Message” will only be printed if any balance is over 30 days old.

Top Message – This message prints at the top of every statement.
Bottom Message – This message prints at the bottom of every statement.
Balance Due Message – This message will only be printed if there is a current account balance.
Past Due Message – This message will only be printed if any balance is over 30 days old AND a specific past due message is NOT defined.
30-60 Days Past Due Message – This message will only be printed if the oldest balance of this statement is between 30 to 60 days old. If no message is defined then the Past Due Message will be printed.
60-90 Days Past Due Message – This message will only be printed if the oldest balance of this statement is between 60 to 90 days old. If no message is defined then the Past Due Message will be printed.
Over 90 Days Past Due Message – This message will only be printed if the oldest balance of this statement is over 90 days old. If no message is defined then the Past Due Message will be printed.
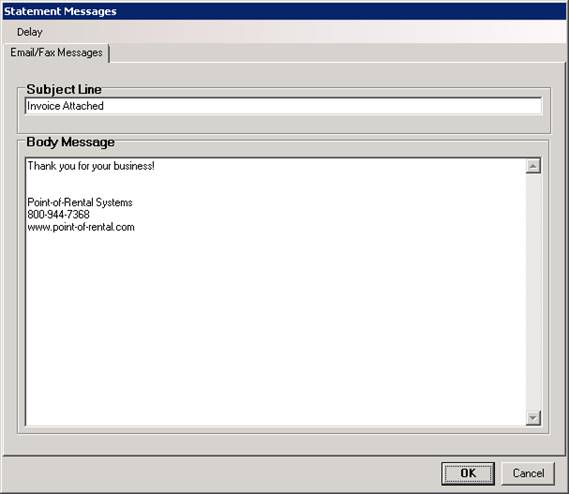
Subject Line – This is the subject line for any emailed or faxed statements.
Body Message – This is the body message for any emailed or faxed statements.
Set as Default – This option will set all the current settings as the default settings the next time you run statements.
Generate - When you click the GENERATE button, the program will process all the transactions for the selected customers. Depending on the number of customers selected and the number of transactions involved, this could take several minutes to complete. Then if you did not choose to bill all customers, you will be asked if more customers are to be billed. If you answer Yes, you will be returned to the PRINT STATEMENTS menu in order to choose another range of customers.
*Note: There is a field in the customer record labeled No Statement. The Print Statements program uses this field to determine whether to print the customer’s statement. With this field checked, no statement will be printed for the customer regardless of any other settings in Print Statements. The only exception is to print a statement for an individual customer. An individual customer statement will print regardless of the No Statement field value.