The route number has been updated to include the stop number and the Route Status is now ready to Load.
* Note – At this point you will want to go Lock these reservations in Day at a Glance so not one alter them.
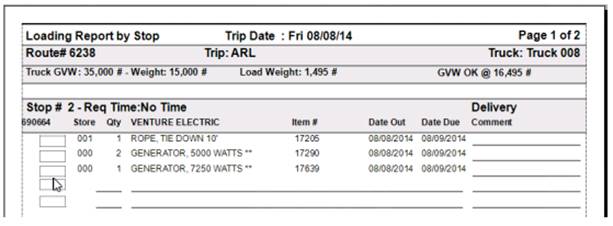
Right Click on a scheduled Trip and choose print report, choose Loading Report by stop menu.
Right Click on the scheduled Trip and choose drivers packet
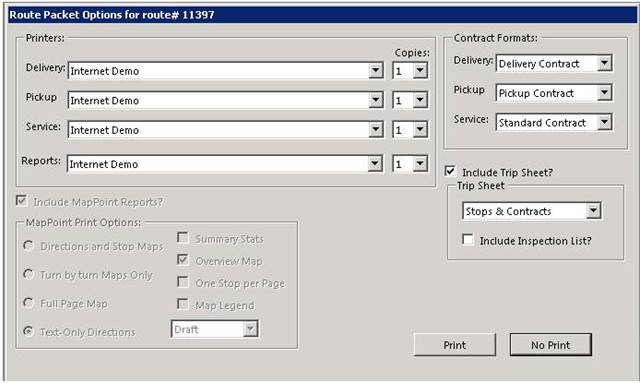
The Drivers Packet is designed to print all necessary paperwork for the driver. It eliminates manual sorting and processing by the dispatcher. It can the following reports.
a. Trip Sheet
b. Overview Map
c. Turn by Turn directions
d. Delivery Contracts
e. Pick Up Contracts
f. Service Call Contracts
g. Item Instructions
h. Contract Attachments
Trip Sheet - Worksheet for the driver to log his arrival and departure times. Displays the planned arrival time, on-site time, and departure time. Ensuring the driver understands the expectation of the customer and or the dispatcher.

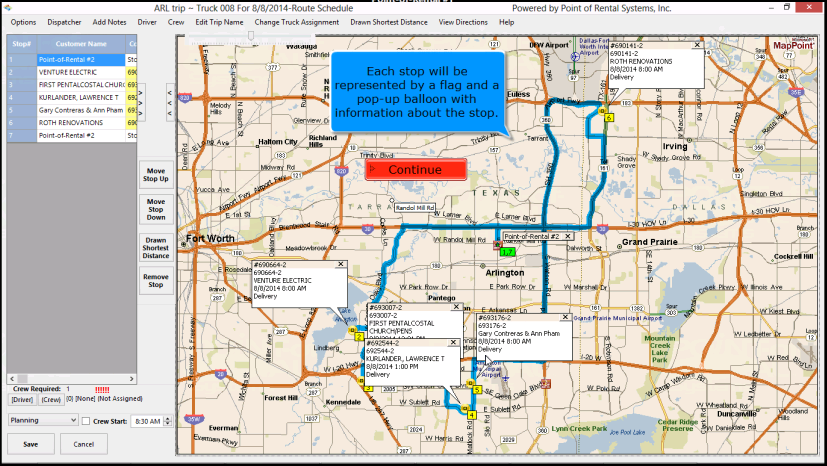
Overview Map - Showing the area and all stops on the route.

Turn by Turn Directions - Directions ensuring on time deliveries and pickups when there is a GPS failure.

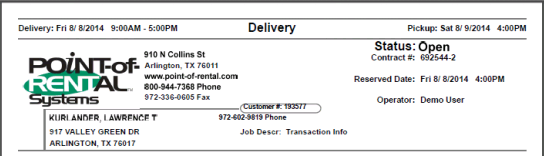
Delivery Contracts - Printed in stop order eliminating the need to sort or reorganize the drivers packet.
Pick Up Contracts – Prints stop order, eliminating the need to sort or reorganize the driver packet.
Routing the Trip
The Stop order for the route still needs to be determined. When looking under the route column you will see an assigned number with a . zero. The number is the route number the .zero is the stop number. The zero indicates that a stop number has not been set. Once the Trip has been routed each contract will display as the route number. X where X indicates the new stop number.
1, Right Click on the route under the truck a box will display the following:
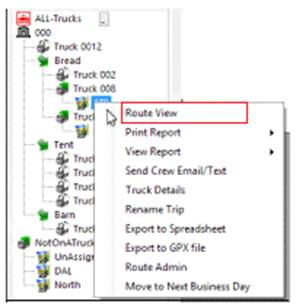
2. Select Route View – This will start the routing process

3. Route Start/End – Multi store systems, you can set the starting and end locations Usallly your store location.
4. Crew – Click the button to assign the crew and their start time.
5. Route Departure Time – Allows you to either select Dynamically or Manual Departure Time
a. Dynamically – Will compute the departure time automatically
b. Manually – Selecting this option allows you to manually select the Departure time. Select the time to the right.
6. Map and Grid - will show routes on map, by choosing this it will add functionality like validating stop address, verifying on-time statues and the ability to visually check the routing.
6a.Grid Only – will set the routes without maps.
After specifying the departure time, click the Map and Grid button. The dispatch center will validate each address.