Header Items sum individual serialized items together in a generic item record. To use the Header Item feature, you need to add an item as normal with all of the standard fields and set the Item Type to Rental – Header or Sales – Header. Put the rates, deposits, damage waiver, link item, and kit items in the header item record. In each of the serialized items, enter the item key of the header item in the “header key” field. That is all you need to do to setup the header items.
When you add a package/suggested item to the header it will put those items on the contract for all serialized items as well, even if they select the serialized instead of the header. It does not need to be on the header and the individual serialized (adding it to both will add the package/suggested two times.
The Rental Header Item feature is most useful when reserving items. Instead of reserving or sending out a specific serialized item you can reserve or send out a Header Item. Then, whenever the specific serialized item is selected it can replace the generic Header Item.
The Sales Header Item feature is most useful when you sell high dollar equipment that you want to track each item sold by serial number, but you want to see the total quantity owned whenever inquiring on the item.
Notes:
The quantity and quantity out of the header item will be dynamically computed from all of the serialized items. So, changing the quantity of a header will have no affect since the quantity will be recomputed.
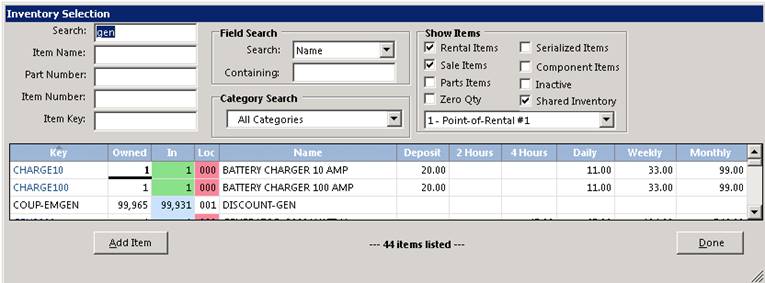
Inventory Selection screen, the key of header items will be displayed in blue.
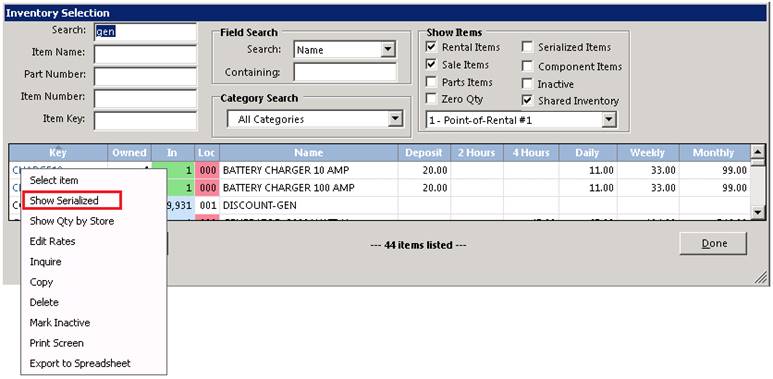
Header Record - you can right click on a header item. Then select “Show Serialized” from the menu or check the serialized item box. A screen showing each of the serialized items related to the header will be displayed. If the serialized box is unchecked, then no serialized items will be displayed.
With the “Force serialized item selection” parameter checked, you must select a serialized item when opening a contract or sending out a reservation. With this parameter unchecked, you can but aren’t required to select a serialized item when opening a contract or sending out a reservation. However, you will be required to select a serialized item upon closing the header item.
Auto Setting Show Item Format
Note: You can auto set the Show Items boxes, by checking the boxes you want to come up each time you enter Inventory Selection. Simply select the items you want to come up. Right click on the blue header bar (Key column) click save. This will lock in your new settings.
Under the Items tab in Contract Processing, the key of any header items on the contract will be displayed in blue. If you right click on the key, you will have the option of “Select Serialized”. When you select this option, each of the serialized items will be displayed. Click on the desired serialized item. The quantity of the header item will be changed to zero and the serialized item will be added to the end of the contract with the same hours, due date, and price that the header item had.

Under the Non-serialized tab in Day at a Glance, all the open contracts with header items will be displayed. By clicking on the desired contract, you will get a menu with “Select Serialized” as an option. By clicking “Select Serialized” you will get an opportunity to select the serialized item that corresponds to the header item on that contract.
Header Items dynamically evaluate the inventory availability