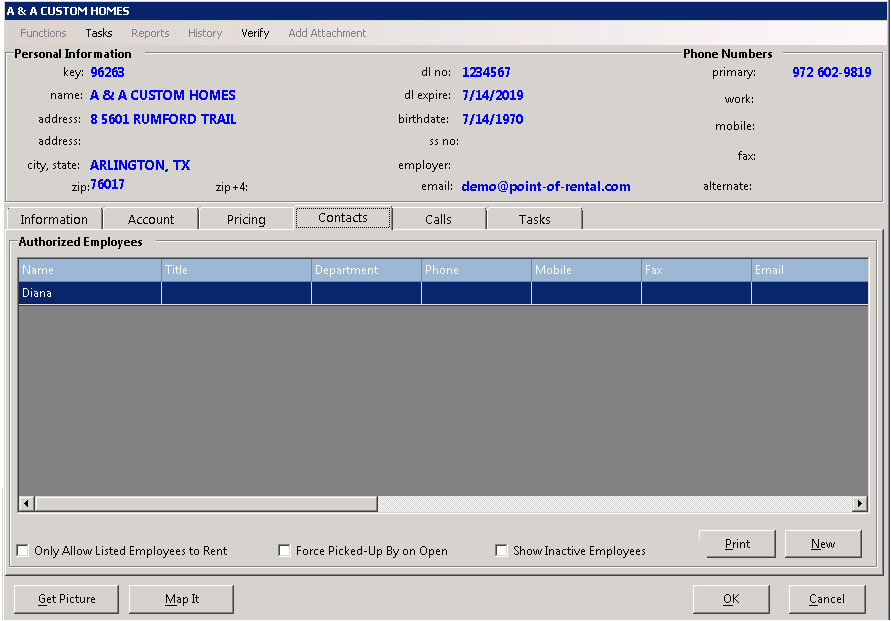
Left clicking on the Contacts tab will display fields on that tab.
Only Allow Listed Employees to Rent – With this box checked, only employees that are listed on the contacts list will be allowed to rent for this customer. With this box unchecked, then the picked up by list will have an option to type in the employee picking up the equipment.
Force Picked-Up By on Open – With this box checked, then the counter person must enter an employee for the picked-up by field on the contract.
Force Ordered By – With this box checked, then the counter person must enter an employee for the ordered by field on the contract. Note: This option is only available if your default overtime rate code is set to Party Rate in Parameters.
Show Inactive Employees – By checking this box, all employees will show regardless of whether they are active or inactive.
New – This button allows you to enter new employees to the authorized list. Note: You can modify any existing employee by clicking on the employee. When you click on New or click on an existing employee, you will get the following screen:
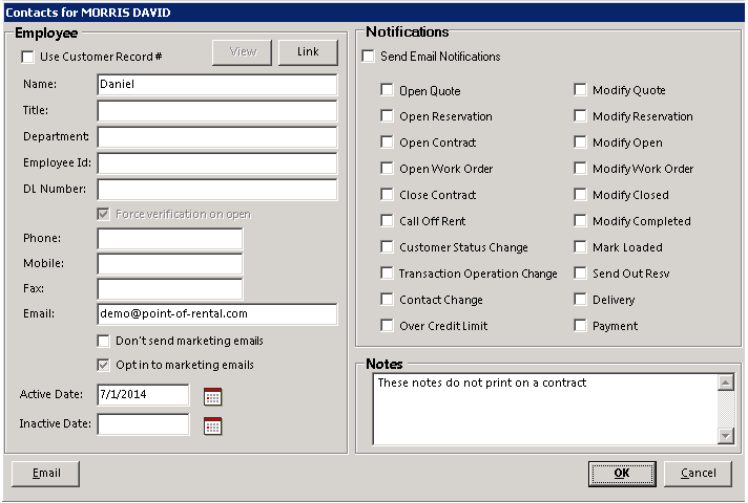
Use Customer Record # - When this is checked, the contact links back to the employee’s customer record in the database.
Name – This is the employee’s name. It will be displayed in the Picked-Up By list when writing a contract.
Title – This allows you to enter the indivuals title ex. (VP, President).
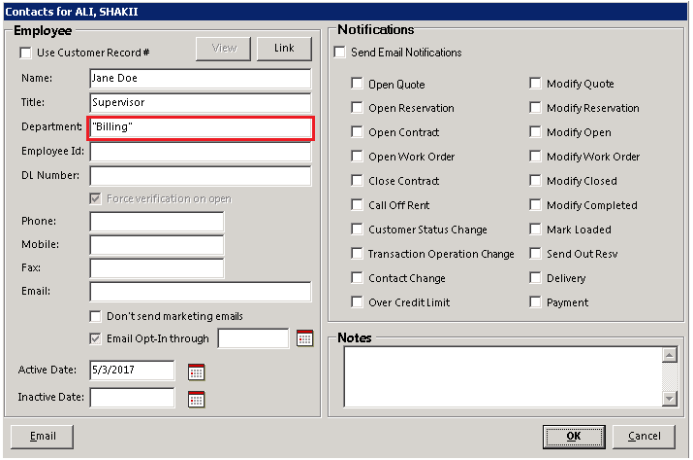
Department – This is the employee’s department such as Office, Accounting, or Maintenance.
Note: When billing a customer and sending out through mass/fax/email, you can set up through the customer record to have mutiple departments receive a copy of the invoice or statement.
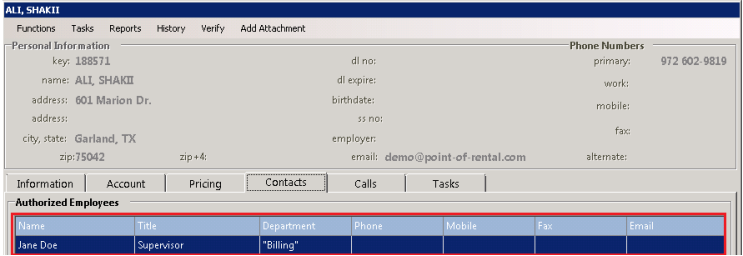
If you are entering a new contact, select the add contact and enter “Billing” in the department field.
•Note: Entering “AP”, “A/P or “A\P” will not work.
Employee Id – This field is for information purposes. You can use it to hold any information about this employee you desire such as “Maintenance Guy” or “Purchasing Director”.
DL Number – This is the employee’s driver’s license number. This field is required if you want to use the force verification option.
Force verification on open – This option forces the counter person to enter the DL Number to verify that this is actually the correct employee. If the DL Number isn’t entered EXACTLY as it is entered on this screen, then you will not be allowed to select that employee. Note: To properly use the force verification option, you should have both the Only Allow Authorized and Forced Picked-Up By boxes checked. In this way, a contract cannot be written to the customer unless one of the employee DL numbers is entered.
Phone – This is the employee’s phone number.
Mobile – This is the employee’s mobile number.
Fax – This is the employee’s Fax number.
Email – This is the employee’s email address. This is used when emailing contracts or Payment receipts.
Don’t sent Marketing emails – This allows the person not to receive emails.
Opt in to Marketing emails – This allows the person to opt in to receiving emails.
View – This button will view the employee’s record. It is only an option if this contact is linked to the employee’s customer record.
Link – This button will link to the employee’s customer record. If the employee does not yet have a customer record, one can be added from the customer lookup screen. Note: If you want to hold a picture of the employee, you must use the link option and store the picture in the employee’s customer record.
Active Date – This date is automatically entered when you add the employee.
Inactive Date – This date is when the employee was no longer allowed to rent under this account. Usually you would want to put the date the customer called and probably add a customer call to document who called to remove that employee from the authorized list.
Don’t Send Marketing Emails – This will mark this record this Authorized Employee not to receive any Marketing Emails.
Notifications – If the Send Email Notification option is selected, the contact person will receive an email every time the modification even happens.