• Note- Point of Rental does not store emails, you can set up a blined carbon copy (bcc) to have a copy sent to your inbox.
Overview: These are instructions on configuring integrated email within Point of Rental as opposed to using a third part program such as Windows Live Mail or Microsoft Outlook. There are several store default emails that can be used for different situations. Unique email addresses can also be assigned to each individual operator which is covered in the second part of this How To. If you still choose to use the MAPI method, such as Windows Live or another program, there is an explanation in the third part of this How To on how it works.
1. Before you begin you will need to gather several settings. These can be retrieved from your email provider (such as GoDaddy.com etc…). These settings are:
• Email Address______________________________________
• Email Password_____________________________________
• SMTP Server_______________________________________
• SMTP Port_________________________________________
• Does your email provider use SSL? □ Yes □ No
2. Go to Configuration>Reports and Notifications>System Email Setup. Options plus each of your stores will appear in the drop down menu. If you only configure one email it needs to be the Global Default Setting. Every operator will use that email account until more specific ones are set up.
• Global Default Setting – this is the default option that if no other default email settings are changed, everyone will use this email address. This one would be a generic email address such as info@(businessname).com. The example below is the configuration of this setting.
• Your Specific Store or Stores – This is here so each store can have their own email address. You might even keep the email accounts the same but change the phone and fax numbers in the signature (Illustrated below).
• Personal Email – The most specific you can be is assigning a personal email account to an individual. If nothing is assigned they will be referred to Global.
• Mass Email Setting – Since this is used to email invoices and statements, an accounting email address would typically be set up for this option. That way the customers see that their invoices came from “Accounting” instead of “Todd” or “Phil”.
• System Notifications – Notifications that can be made for Contracts and Salesmen will be sent from this address. For information on how to set these notifications see the How To for Contract Notifications and Salesmen Notifications under the Miscellaneous section.
• Internet Fax Setup – This is a service where you can email a contract to a company and they will fax it for you. That way your server does not need an installed fax modem. The only company that provides this service at this time is Metrofax.
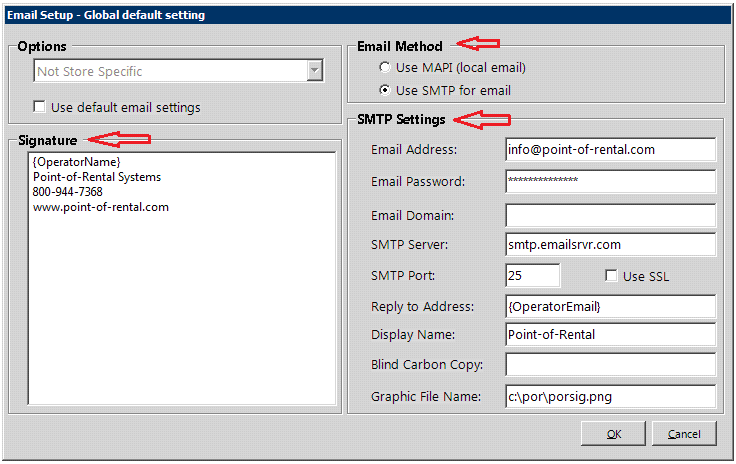
3. Click on the one you want to configure (we are doing Global Default Setting) and then click Edit. It will bring up a screen like the one below. Input the settings you retrieved from your email provider. Below is a properly configured email account.
• Email Method
o Use MAPI (local email) – This option is to use the old way of emailing
o Use SMTP for email – This is the new option which will let you fill out the below information
• SMTP Settings
o The first 6 questions is the information from the top of the How To.
o Reply to Address: Enter in an email where you would want the recipient to reply. If you want it to be the same leave it alone.
o Display Name – How the recipient will see who the email came from.
o Blind Carbon Copy – Since there is no place to check your sent items, you can put in your own email address to get a copy of what you sent for verification. You can also put multiple emails in this field by separating them with a semi colon and a space.
o Graphic File Name: You can place a logo on your hard drive (make it easy by putting it in your POR folder) and put the path to it for it to appear at the bottom of your signature. Make sure it’s a normal size (1 x 2 inches or so).
• Signature – Place your signature here, any special fields, such as customer name, will not show up in the signature if they are not applicable. For example the customer name will not show up on emails that have been mass emailed.
Configuring Email for a Specific User
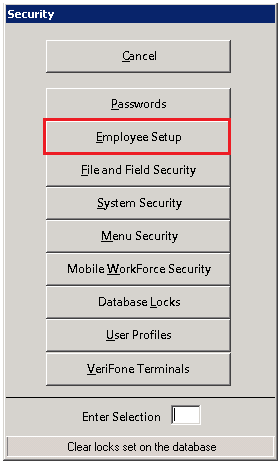
From the Program Menu go to Security>Employee Setup.
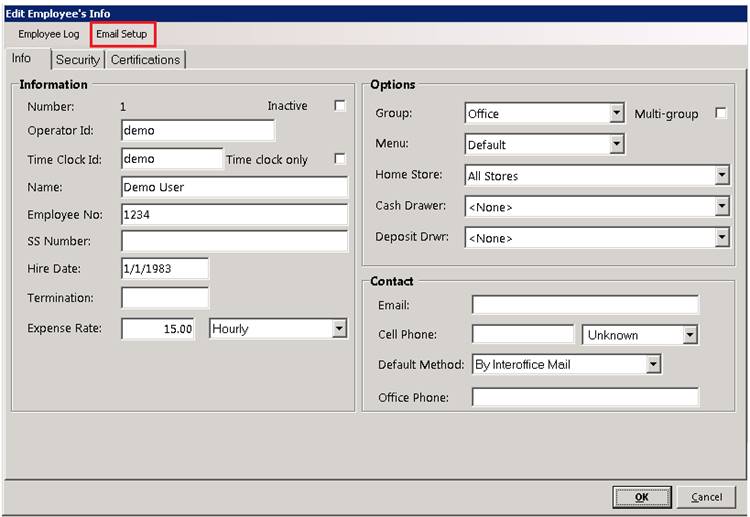
Find the user for whom you want to set up an email account and click on them. At the top of their record there is a button called Email Setup. Click on it.
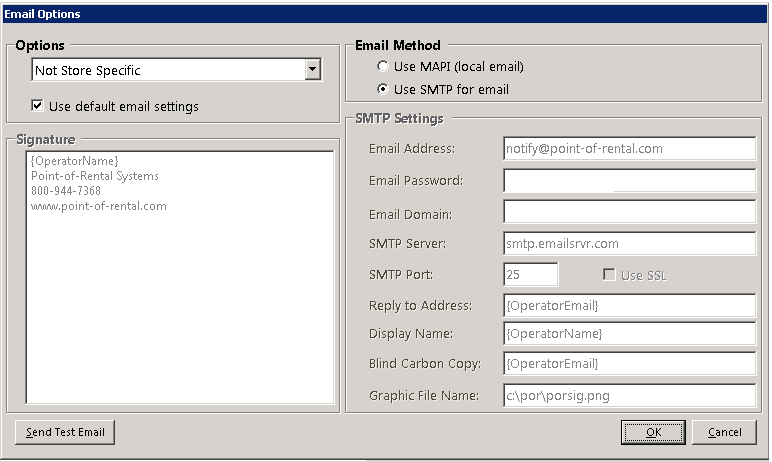
This will bring up a window like the one in Email Setup in Configuration but is for a specific user. At the top left if you wish them to have a certain stores’ default email you can select it after checking the “Use Default Email Settings” box. Otherwise you can set them up an individual account like the one below.
How Email in Point-of-Rental Works
Overview: When you email a document through Point-of-Rental by using Windows Live or another program, A PDF is created and attached. Point-of-Rental then checks for the default mail program ON THE TERMINAL in which you are sending the email. If you do not have an email program (such as Microsoft Outlook or Windows Live) configured on the terminal from which you are trying to email, nothing will send (you will get several error messages if this is the case). Point-of-Rental will then open up the default email program and send the email.
If the Customer DID NOT Receive the Email. (MAPI)
Here is what to do if a customer calls claiming they did not get the email you sent them through POR.
Go to the terminal from where the email was sent. If they were automatically sent at the end of day, go to the terminal from where you closed that day.
Open up your email (Windows Live or Microsoft Outlook)
Go to the folder, “Sent Items” and look for the message for that day.
If you do not see the message that means Point-of-Rental did not generate the email. If you do see the message, however, it means everything worked fine on your end and it is a problem on theirs. If that is the case, please look at the following possibilities to see what might be the problem.
If the Customer DID NOT Receive the Email. (SMTP)
Here is what to do if a customer calls claiming they did not get the email you sent them through POR.
Go to Program Menu>Configuration>Reports and Notifications>System Email Setup.
Select Global Settings
Check to make sure SMTP for email is selected at the top of the screen.
Verify the Email Address, Email Password, SMTP Server, SMTP Port and Use SSL are exactly the same as what is set in your Email provider
To test email, click on the “Send Test Email” button, enter an email address. If your message went through, you will see “message sent”. If you do not see this message that means the email was unsuccessful. Please look at the following possibilities to see what might be the problem.
Likely causes of the Recipient Not receiving your Email.
• The default message that POR says when sending a contract is, “Your invoice is attached”, and this can be flagged by other people’s email as spam. You can change this in your parameters.
• The recipient's email provider has filtered the mail as spam or junk mail based on the content or the senders (your) IP address
• The Junk Mail filter has identified one or more keywords that spammers repeatedly use in their messages
• The recipient has set up 'rules' in their mail program that are too generic and therefore tagging your mail as spam.
• The recipient has flagged the sender as someone that sends spam
• You are sending an attachment with your message and you have included wording that is considered to be SPAM.